No Products in the Cart
How to Install Top Down Bottom Up Blinds: DIY Guide for Beginners
|
|
Time to read 5 min
|
|
Time to read 5 min
Installing top down bottom up blinds might sound complicated, but don’t worry, because you don’t need to be an expert or even particularly handy. With a few basic tools and a bit of patience, you can absolutely do this yourself.
These blinds are a clever way to let daylight in from the top while keeping things private down below. Super handy in bedrooms, bathrooms, basically any space where you want both sunlight and privacy. And if you’ve never installed blinds before, no stress - we’re doing this step by step.
For more related content check out our articles:
Table of contents
Set aside about 30 to 60 minutes per window, especially if it’s your first time. This isn’t a speed run. Slow and steady wins here.
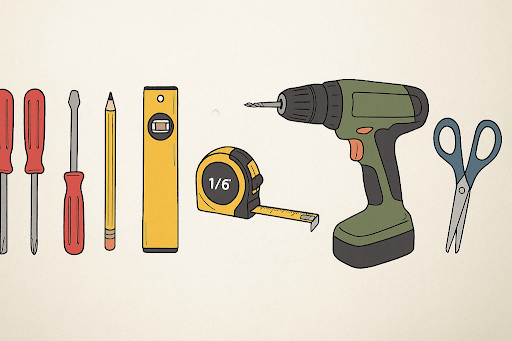
Tools checklist:
Quick tip: If you can, work during the day. Natural light helps heaps with leveling and marking things properly.
Before you start drilling, decide how you want your blinds to sit:
Inside mount – Fits inside the window frame for a cleaner, more built-in look. Just make sure your window frame is deep enough.
Outside mount – Sits outside the frame or above it. This works well if your window frame isn’t deep or if you want more light blocked around the edges.
Tip: Check the packaging for the minimum depth required for an inside mount. It’s usually listed there.
Hold the blinds up where you plan to install them and lightly mark the top corners with your pencil. This shows where the headrail (the top bar) will go.
Important: Use a level here. If the headrail is even slightly crooked, the blinds will be too, and fixing that once it’s drilled in is a pain.
Grab your measuring tape and measure about 3 to 4 inches in from each side of the window frame. That’s your sweet spot for the brackets.
Hold each bracket up to the marks and look through the screw holes. Lightly mark where each screw will go.
This part’s all about symmetry and support, it’s what holds the whole thing up, so take your time.
Grab your drill and pop in a 1/16-inch bit. Line it up with the pencil marks you made earlier (see step 3), and drill in slowly. You don’t need to go deep, just enough to make starting the screws easier and to avoid cracking the surface especially drywalls.
Tip: Try to keep the drill nice and straight while you work. If it’s on an angle, your brackets might end up sitting a bit off. (Remember: crooked holes = crooked blinds).
Hold the bracket up to your pilot holes and drive in the screws using a drill or screwdriver. The bracket should sit snug against the surface, not too tight, not too loose.
Once both brackets are on, step back and check that they’re aligned and level. If anything looks off, adjust now before moving on.
Give each bracket a gentle wiggle test. If they feel loose, tighten them up.
Those little plastic pieces in your package? They’re end caps , and they snap onto the ends of the headrail.
They give your blinds a finished look and help the headrail slide more smoothly into the brackets. Easy to forget, but they make a difference.
Lift the blinds and slide the headrail into the brackets. You should feel or hear a soft “click” when it locks into place.
If it doesn’t click in or feels a bit loose, don’t force it. Just take a moment to realign the headrail and try again.
Tip: If you’re installing on a wide window, it can be tricky to balance so use both hands or ask someone to help hold one side.
Top down bottom up blinds are usually cordless and come with clip-on handles. These let you pull the blinds up from the bottom or down from the top.
Once they’re clipped on, give the blinds a test run. They should move smoothly in both directions.
Almost there! Give everything a once-over:
If something feels off, don’t stress. Here’s a quick troubleshooting guide:
Problem |
What Might Be Wrong |
How to Fix It |
Blinds won’t stay up or sag |
Headrail may not be fully clicked into brackets |
Gently remove, realign, and push until it clicks |
One side looks lower than the other |
Brackets may not be level |
Loosen screws, adjust slightly, then retighten |
Blinds are hard to move |
Handles may not be clipped on straight |
Remove and reattach handles more securely |
Blinds shift when operated |
Screws might be loose |
Check all hardware and tighten if needed |
It’s totally normal to do a bit of fine-tuning after installation, think of it as part of the process.
Your blinds are up, but don’t forget about the aftercare. With just a little maintenance, they’ll stay looking fresh for years:
Weekly: Wipe the slats with a microfiber cloth or use a small handheld duster to prevent buildup.
Monthly: Give them a deeper clean with a damp cloth. Avoid harsh chemicals, warm water with a drop of dish soap is usually enough.
Every few months: Test the lift handles and top-down mechanism to make sure everything moves smoothly. Tighten any loose screws or brackets.
Seasonal tip: In summer and winter, adjust the top and bottom openings to control natural light and temperature more efficiently.
Taking a few minutes to maintain your blinds will extend their life and keep them looking like new.
Once you see them in action, you’ll get it. These blinds are a great combo of form and function:
Flexible privacy – Open the top for light, keep the bottom closed for privacy.
Energy efficiency – Helps insulate in winter and block heat in summer. Great for Canadian homes with changing seasons.
Cordless design – Safer for kids, cleaner look overall.
Easy to use – Once they’re in, you’ll wonder why you didn’t do it sooner.
Congrats, you just installed top down bottom up blinds! You measured, drilled, lined everything up, and now your window looks amazing. Even better is that you did it yourself.
And if you’ve got more windows to go, you’ll be faster and more confident with each one.
Got questions? Run into a hiccup? Leave a comment below, we’re happy to help!


